Manage Organization Operations - Access and Controls
Users within Snap Projections may be part of a team of multiple users, allowing them to share client data. Within this organization, one or more users can be granted permission to manage organization operations and/or manage organization billing.
Organization Operations Managers can review and edit all team members' client profiles and manage sharing for all client profiles on behalf of their team members. The Operations Manager can also make changes to User and Organization settings.
Organization Billing Managers can view and update billing information.
In this article:
- 1
-
View a User's Client List
As an Organization Operations Manager, you will see a drop-down list in the main navigation bar to enable you to switch your view from your own scenarios (the default view) to a list of client profiles created/owned by each team member.
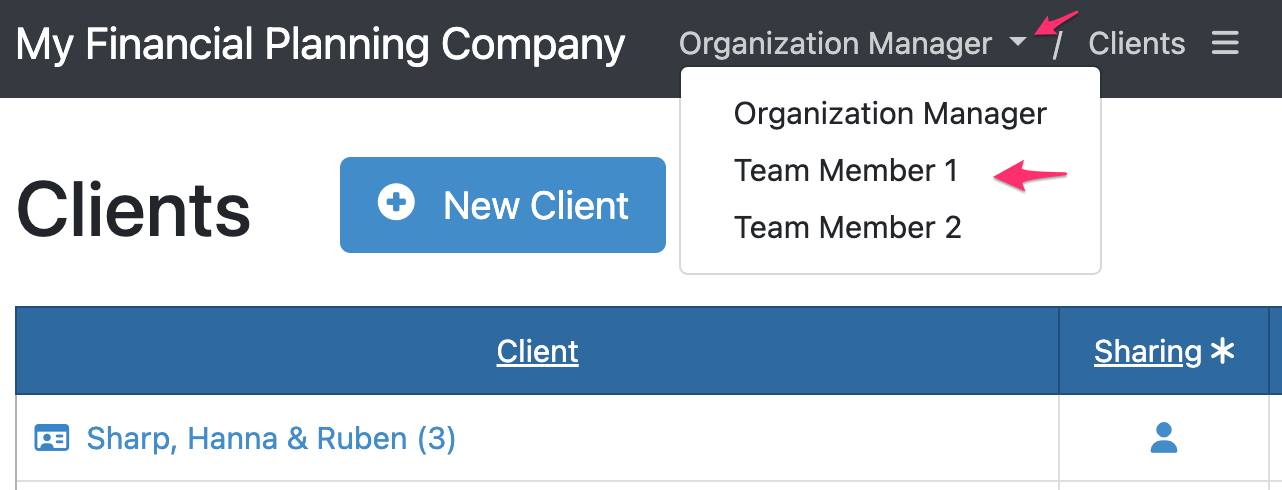
Depending on your screen resolution and monitor size, you may see a different view. If the drop-down list is not visible in your main navigation menu, click the hamburger menu icon at the top right to open more options.

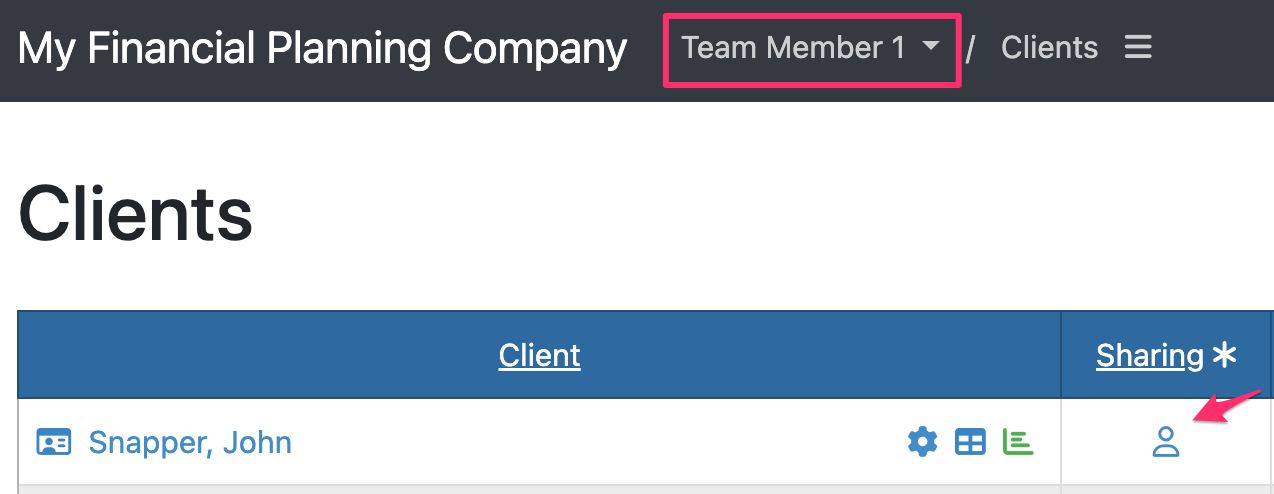
Selecting Team Member 1 from the dropdown list, for example, will change your view to all clients created by/owned by Team Member 1.
Note that you can't see the clients shared with a user in their list, only the clients they create/own.
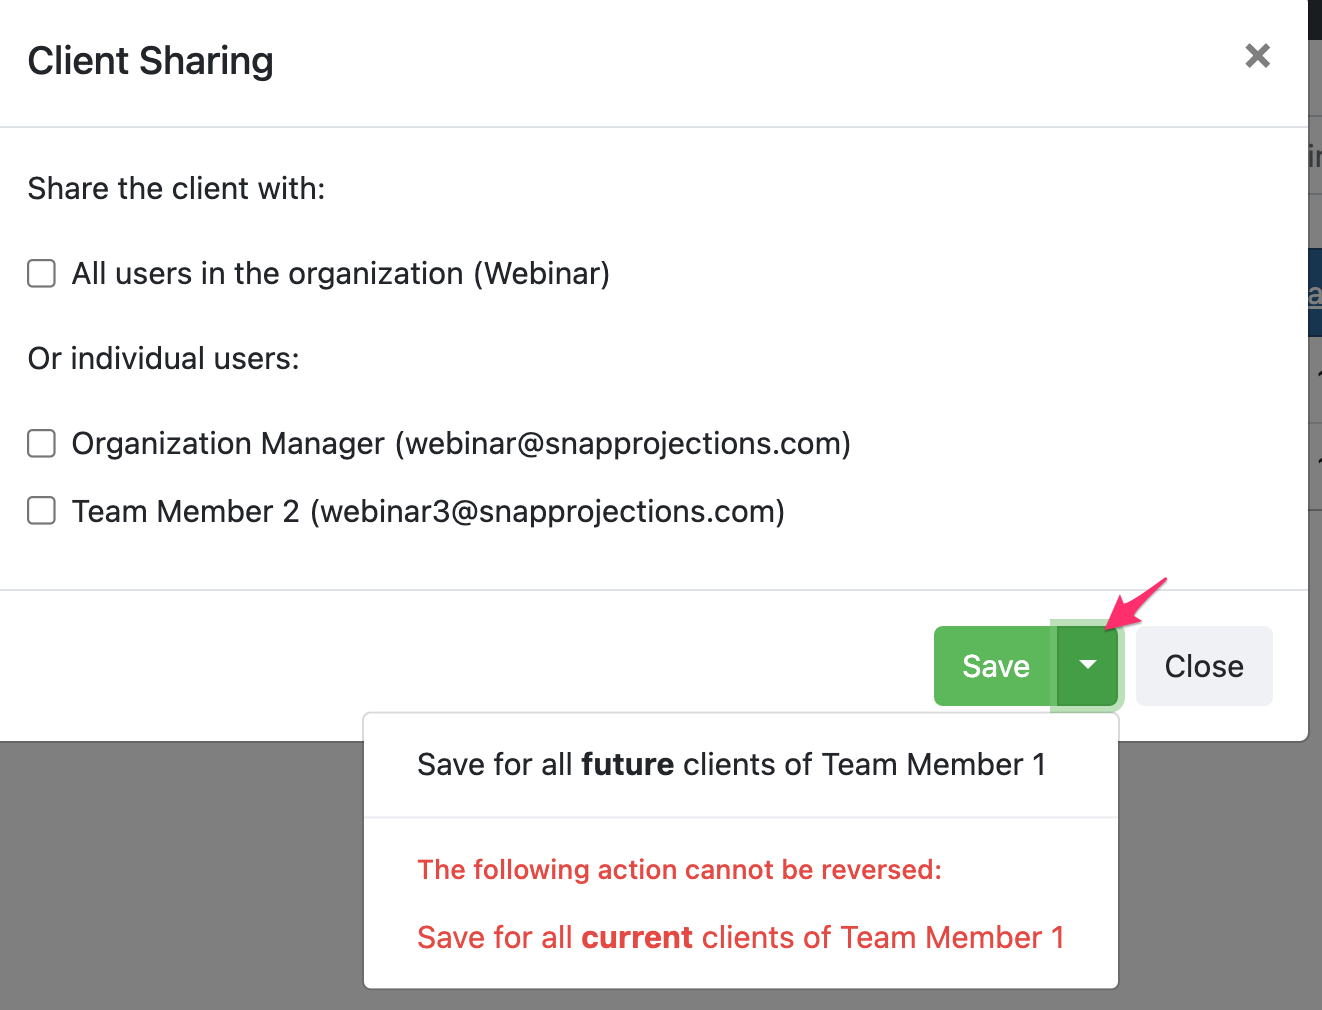
You can select the name of any client to open and edit their projections, or you can select the Sharing icon to share client profiles created by Team Member 1 with other team members. A shared client profile can be edited by all team members and each user will see the updates immediately.
If desired, you can save sharing settings for all future or existing clients created by Team Member 1 by selecting the drop-down arrow beside the Save button.
If you select the New Client Scenario button from any view, the new scenario will be displayed as part of your own default view and you will be the owner of that new client scenario.
- 2
-
Transfer profiles between team members
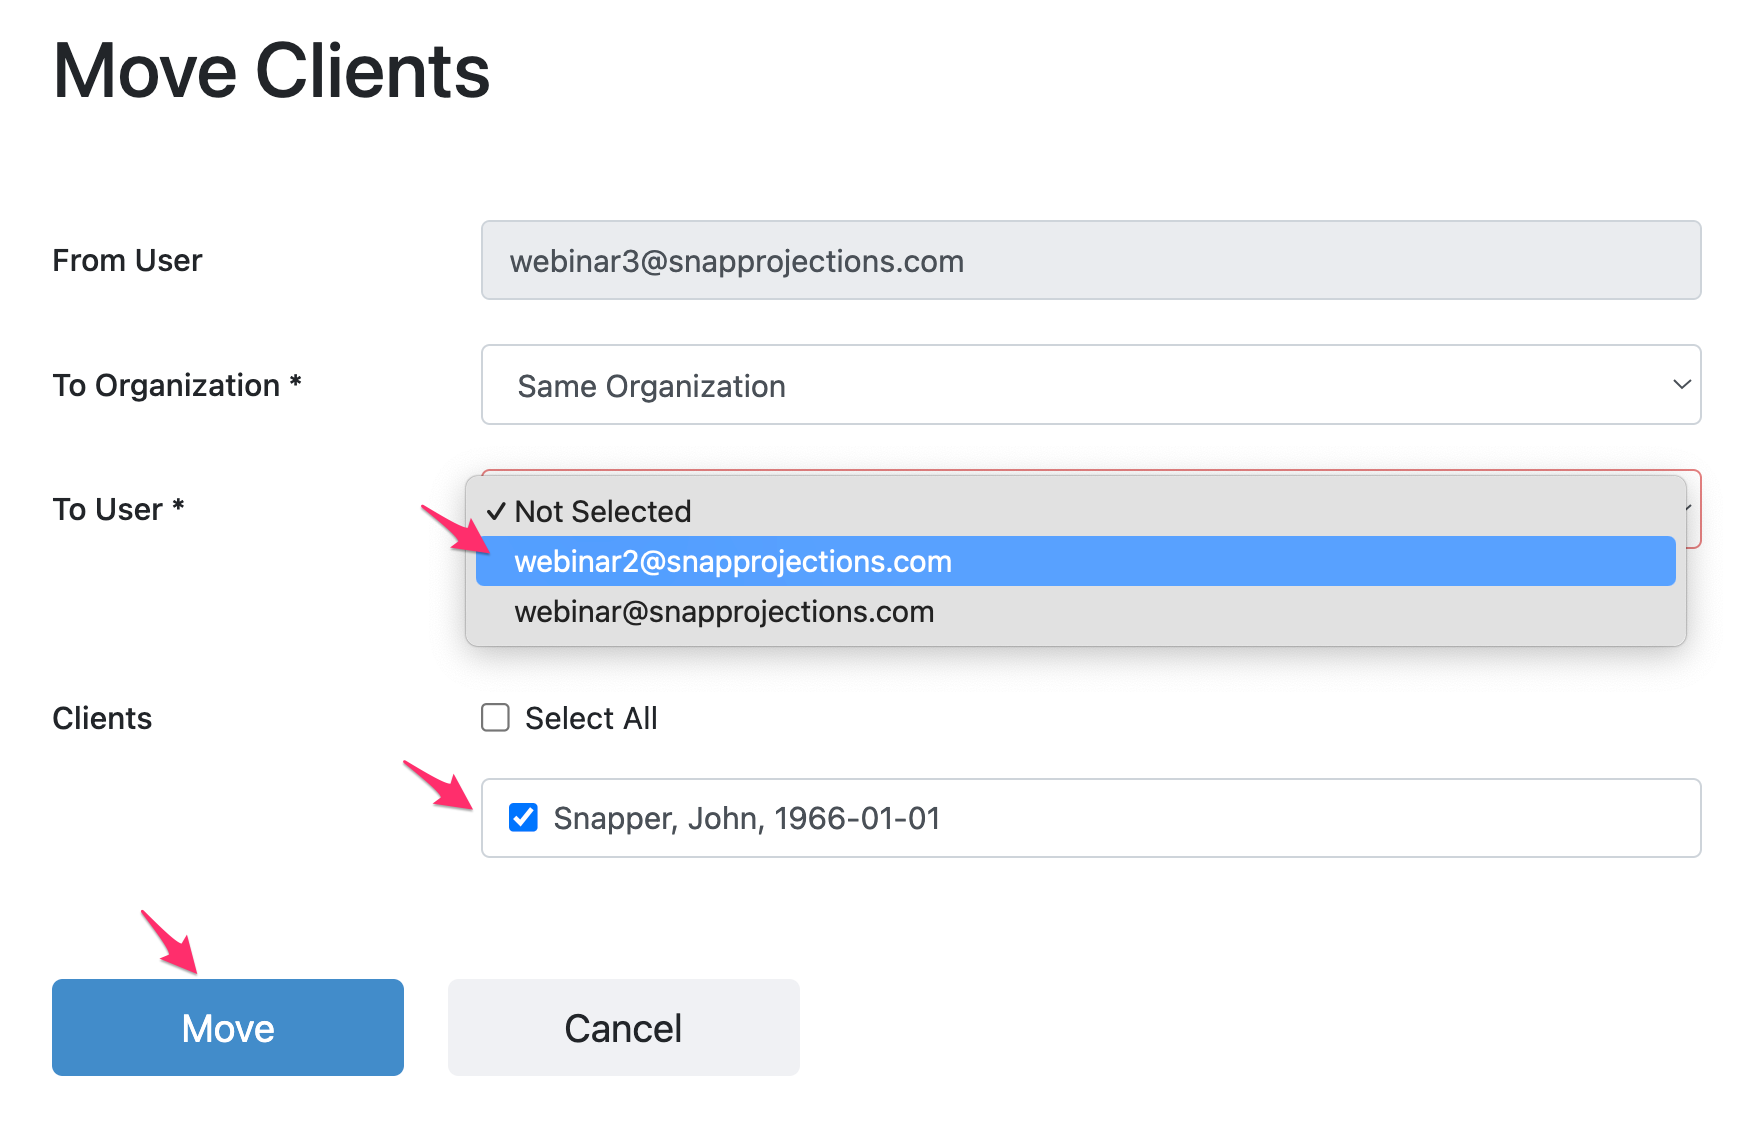
If a team member no longer needs access to a client profile, but another user does, you can transfer its ownership. Under the Actions column, you can Move (blue arrow) or Copy (green arrow) a client profile.

Move a Client Scenario from one team member to another (blue arrow)
Selecting the blue arrow opens a page to Move Clients. Here you can select the team member to move the client profile to. This team member will be the new owner of the client profile and it will remain shared with all of the team members previously selected for sharing.
You can move multiple client profiles or select all profiles to move simultaneously. Once the User and Profiles are selected, click the Move button at the bottom of the list to complete the process.
Copy a Client Scenario from one team member to another (green arrow)
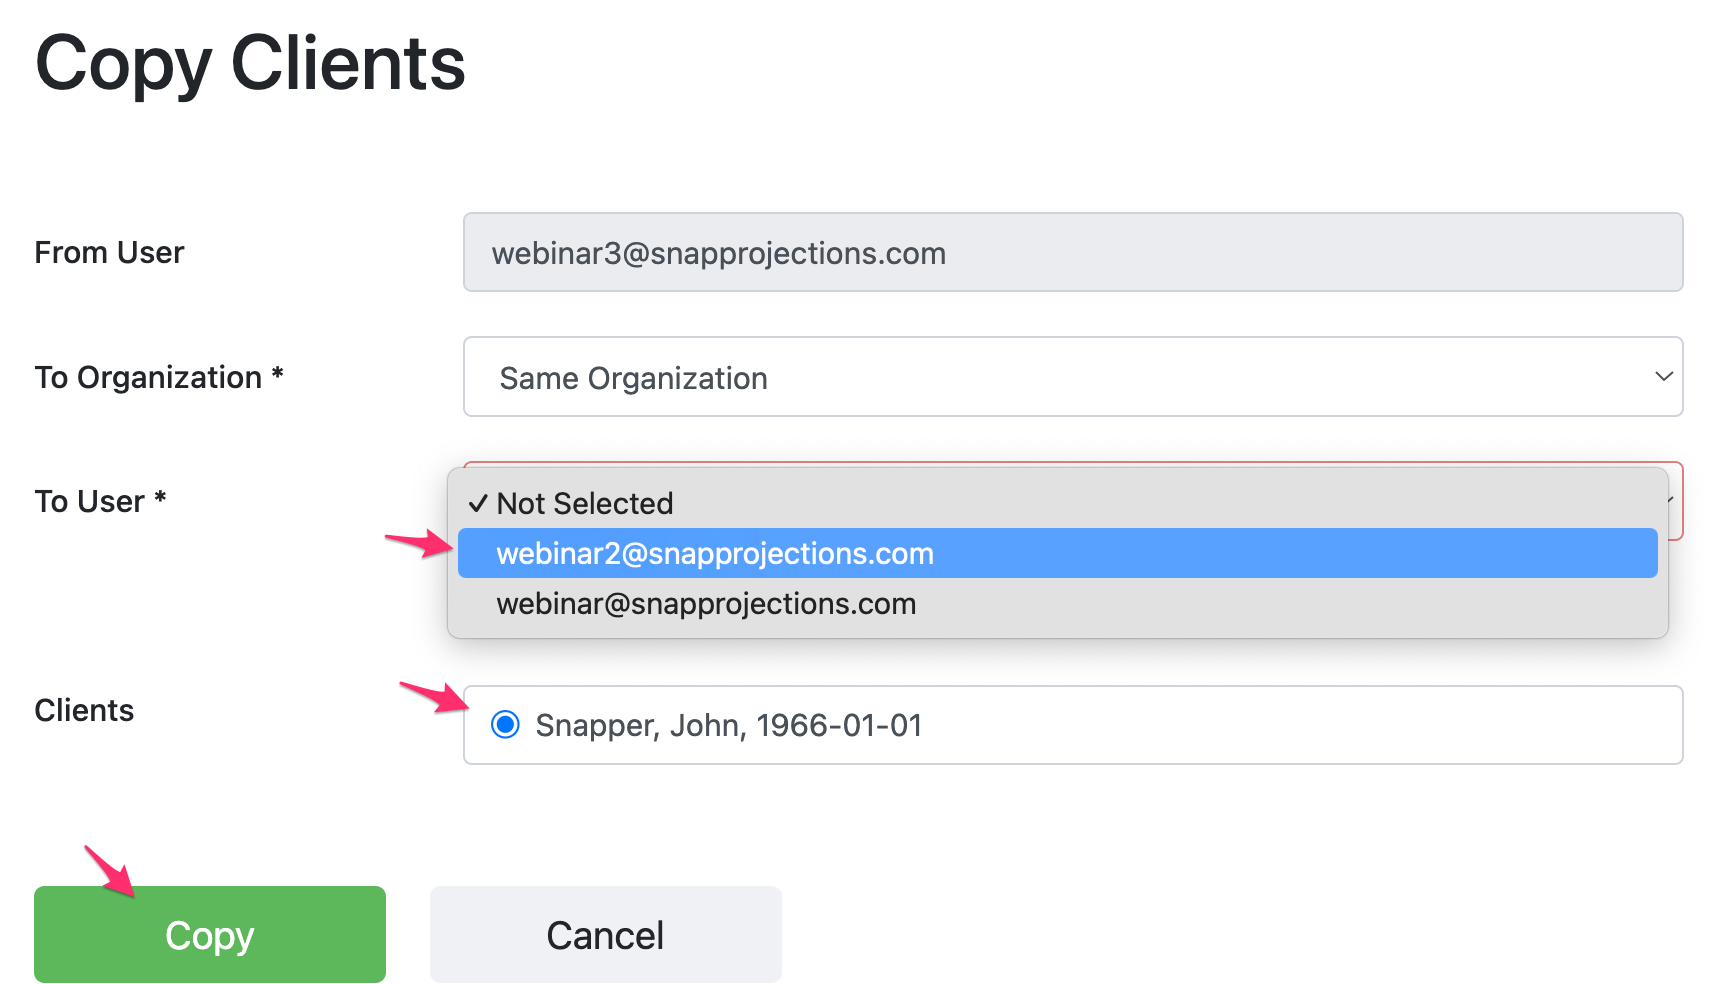
Another method to transfer a client profile is to copy it. Selecting the green arrow opens a page to Copy Clients. Copying will create a second instance of this client profile, and the copied version will not be connected to the original. All sharing settings will be removed from the copied version.
Note: Use the copy functionality with caution. A copied client profile will only be the same for one moment in time. Going forward, each user can make changes to their own version that will not be reflected in the other copy. It will be difficult to know which version is the most accurate going forward. To maintain consistency, sharing client profiles would be the better option because in that case, updates made by one user are visible to the other user. Copying can be useful for test clients or sample clients that you wish to share with all team members.
Unlike moving client profiles, you can only copy one client profile at a time. Once the User and Profiles are selected, click the Copy button to complete the process.
- 3
-
Organization Settings - white labelling
The Organization's Operations Manager can access and make changes to the Organization Settings. You can view these settings by selecting your initials on the right-hand side of the black title bar.

You can view the organization name in the General Section under Organization Settings. This name is not client-facing as it only relates to the name of the organization for the Snap Projections account.
For white labelling purposes, you can update the Brand Name to change the name displayed at the top left of the application. If this field is left blank, Snap Projections will be displayed at the top left of the black title bar.
Edit the Brand Name and then click the Save button at the bottom of the page. The Brand Name change applies to all team members.

- 4
-
Team member settings - username/password changes
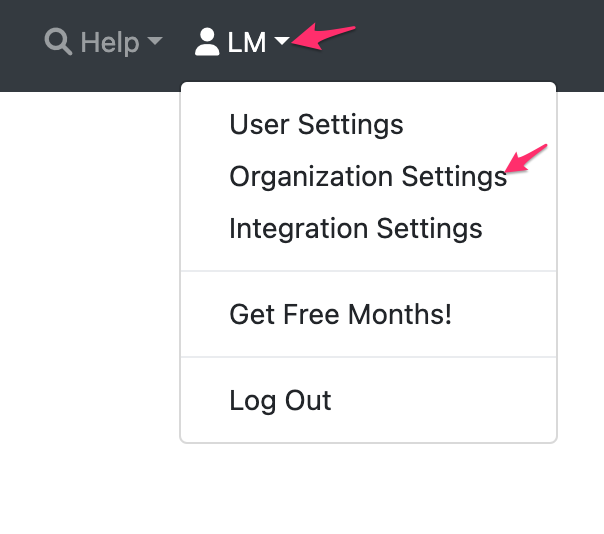
Go to Organization Settings by selecting your initials on the right-hand side of the black title bar.
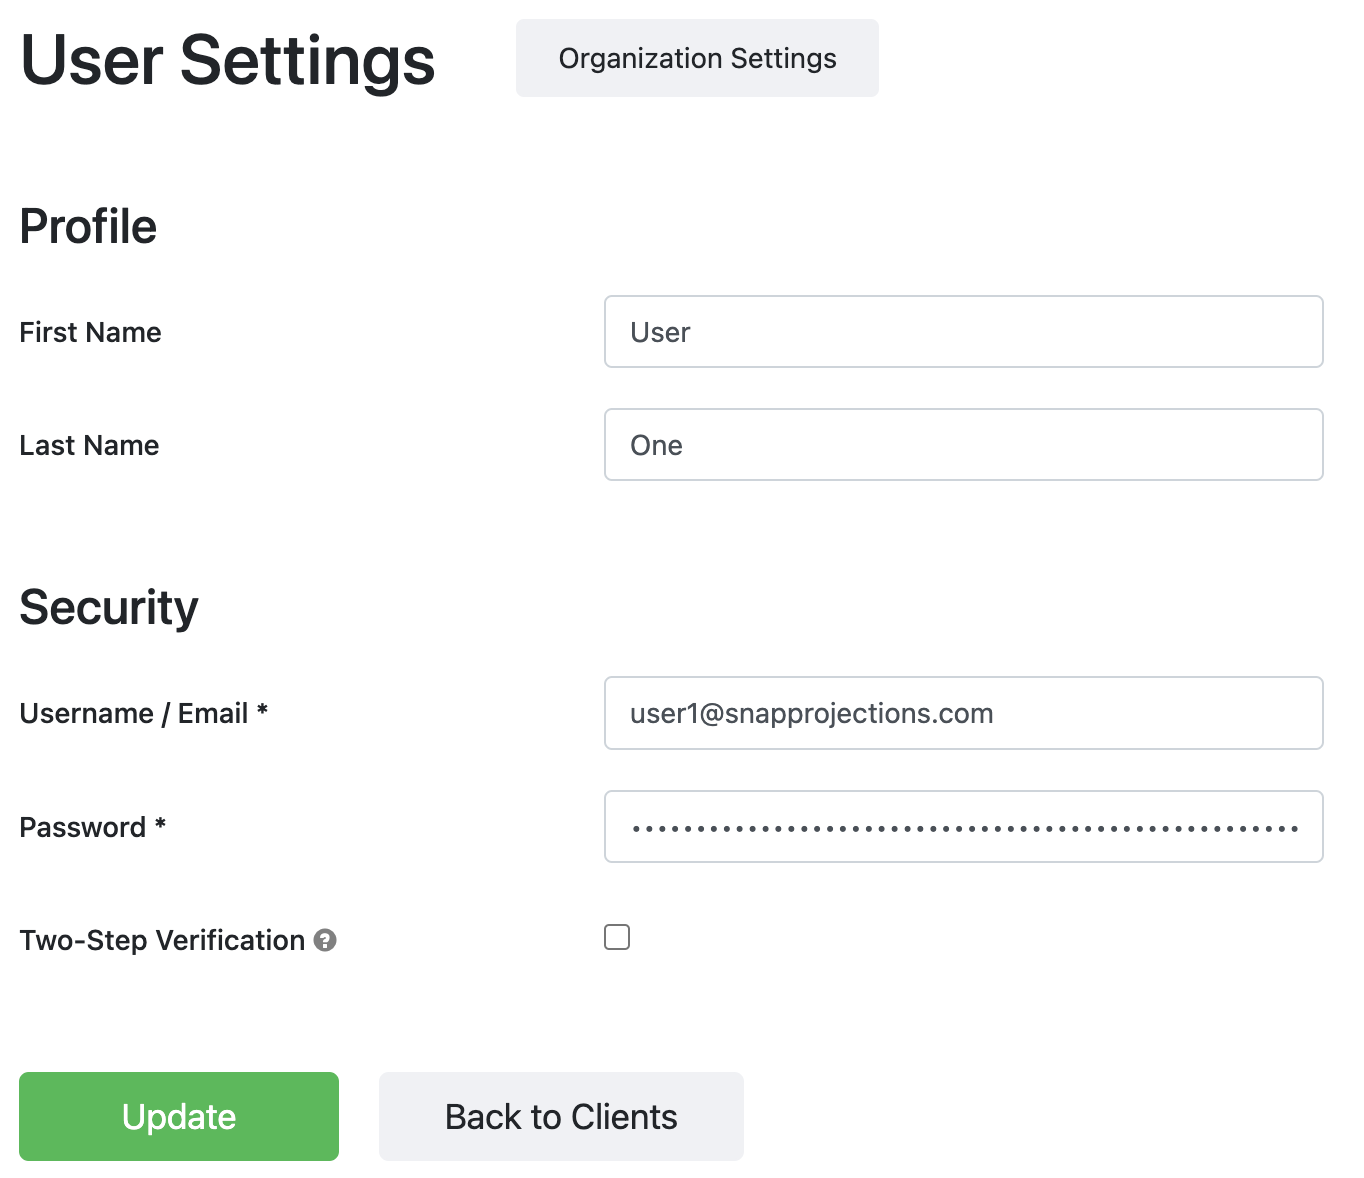
All team members are listed under the Users section of this page. Open an individual's User Settings by clicking their name under Users.
Under Profile, you can edit the first and last name of the user.
The Security section allows you to update this team member's email address and password, and enforce Two-Step Verification by email. These changes are only applied to that specific user. If a user has left your organization and you wish to prevent their access to the application, you can immediately change their Security information and call us at 1-888-758-7977 Option 1 to remove their account.
- 5
-
Manage Organization Billing
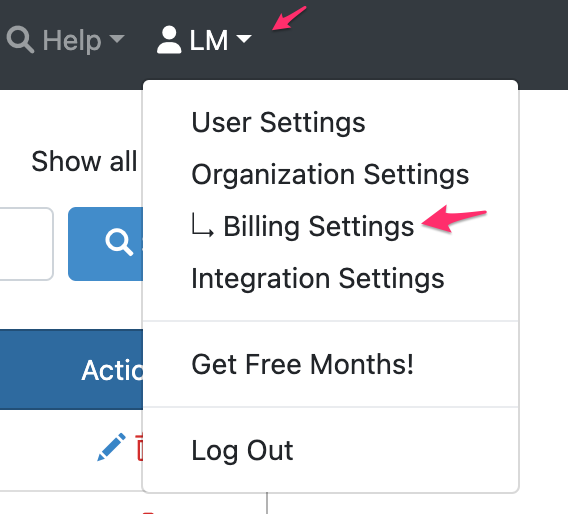
With appropriate permissions, you can access Organization Settings -> Billing Settings from the menu under your initials in the top right of the black title bar.
On the Billing Settings page, you can access information about your next payment and update your credit card.
To change your team's plan from a monthly to an annual subscription, select the new plan from the drop-down menu. Note that team sharing is only available with the Advisor Business Subscription.
To activate or deactivate add-on features such as Stress Testing for your entire team, select the Activate or Deactivate button. (To activate or deactivate add-on features for an individual user, first select their name from the Users list, above the Billing section.)
