How to delay RRSP deductions
In Snap projections, the default approach for RRSP contributions is to claim deductions immediately to reduce Taxable Income in the same year. In some cases, you may wish to delay the use of deductions or spread them over several years.
In this article:
- 1
-
How to make a lump-sum contribution to use up all RRSP contribution room
-
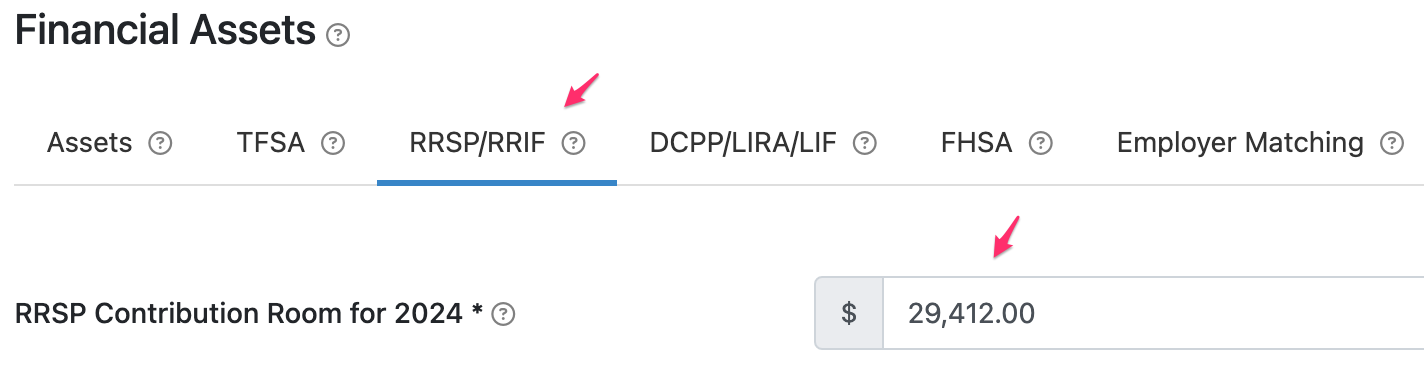
Update the client's unused RRSP Contribution Room under Scenario Setup -> Assets -> Financial Assets -> RRSP/RRIF.
-
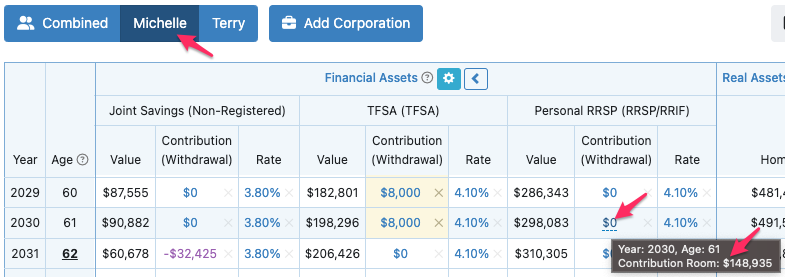
On the Individual Planning page (not Combined), navigate to the financial asset and the year in which you want to make a lump-sum contribution. Hover your mouse over that year's value under the RRSP Contribution (Withdrawal) column to confirm the contribution room, displayed within a grey tooltip.
-
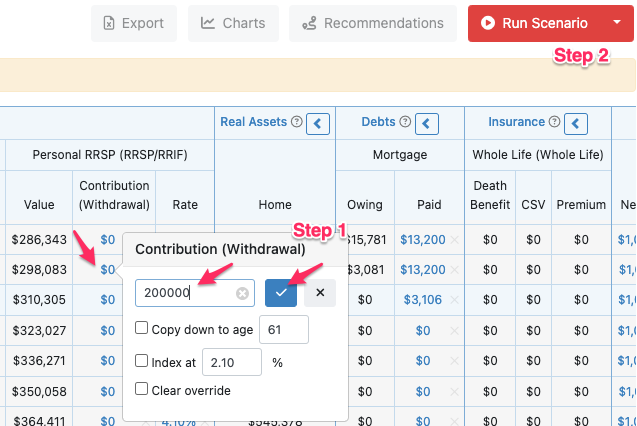
Click the value in the Contribution (Withdrawal) column to edit it. To use up all of this available contribution room in one year, enter this amount or any amount larger than this. Click the large blue checkmark to apply your changes and Run Scenario.
-
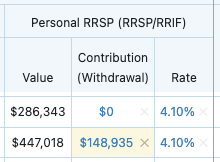
Your entry will be updated with the maximum allowable contribution.


- 2
-
How to delay an RRSP deduction or spread it over several years
Option 1: Use Income Tax adjustments (for consistent tax deduction amounts)
This is the simplest option and tax adjustments will happen in the background.
-
Select Scenario Setup -> Settings -> Income Taxes. This page allows you to customize default settings and add Taxable Benefits, Tax Credits, and Deductions.
- For the year you're making a lump-sum contribution, enter a Tax Benefit for the amount you want to carry over to future years. This will increase the Taxable Income in that year, which offsets the RRSP deduction associated with the RRSP contribution that year.
- Enter a Tax Deduction for the applicable years. In this example, the client has a $40,000 contribution at age 44 but wants to spread out the deduction evenly over 4 years (ages 44-47):

(Note that the $10,000 deduction for the first year (age 44) will be automatically captured based on the RRSP contribution that year so it is not added under the Tax Deductions on this page.)
Option 2: Create two new income sources (for variable tax deduction amounts)
This option is more complex but provides flexibility for deduction amounts and more transparency since the RRSP deductions are displayed on the Planning page.
-
Under Scenario Setup -> Incomes, add two new income sources, one that is taxable and one that is non-taxable, both with a $0 amount.
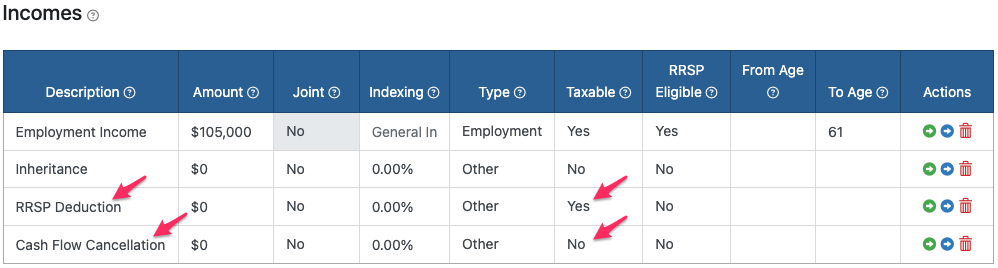
- On the Individual Planning page, enter a positive value in the RRSP Deduction column for the amount to carry forward. In this example, we are carrying forward $30,000 out of the $40,000 contribution. Then to make sure the client's cash flow is appropriately accounted for, we need to flow out $30,000 after-tax by entering -$30,000 in the Cash Flow Cancellation column that year.
-
In subsequent years, we can lower the Taxable Income by entering a negative value in the RRSP Deduction column and an equal positive amount in the Cash Flow Cancellation column.
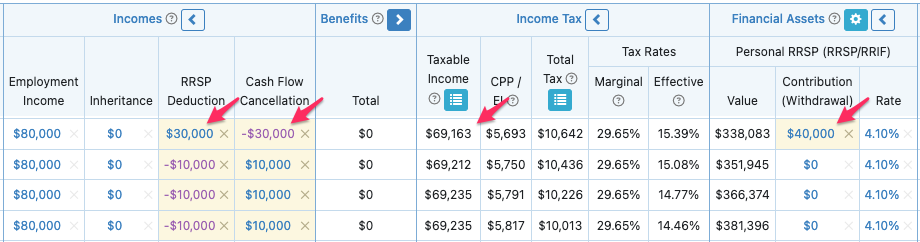


This will result in the appropriate Taxable Income amounts and taxes. You can view the Taxable Income Details table by clicking the blue menu icon in the Taxable Income column header to confirm the data entry was correct.